In previous post “Recover Deleted Videos on an SD Card (Part 1 of 3)” we explained how to create a image file from a damaged card. Now it’s time to go on and see how can we access to the damaged footage and finally, repair it.
You should have a .img file with a size similar to the damaged disk capacity. If the disk still contained video, the footage must now be inside your file as well.
Your .img file will now be split into tiles, like an archaeological excavation grid. We will search for video inside each tile. Keep in mind that as well as in an excavation, lots of sand could be dig out before finding a bone. So same could happen with your deleted video.

1. Figure out how many tiles
If the average size of the video file that you want to recover is 500 MB, divide your .img file into tiles of 500 MB. For example, a 32 GB card will give you: 32000/500 = 64 tiles.
You can reduce the number of tiles in the first pass, then narrow down once you have verified that your footage is present.
2. Split your .img file into tiles
You can use free software like HJSplit to perform this task.


Tiles files will have same name as your original .img file by default, but adding a .00x suffix that will be increased according to the number of tiles created. In the example below, 8 tiles of 500 MB were created from an .img file of 4 GB.

3. Run MP4repair.org diagnostics on each tile
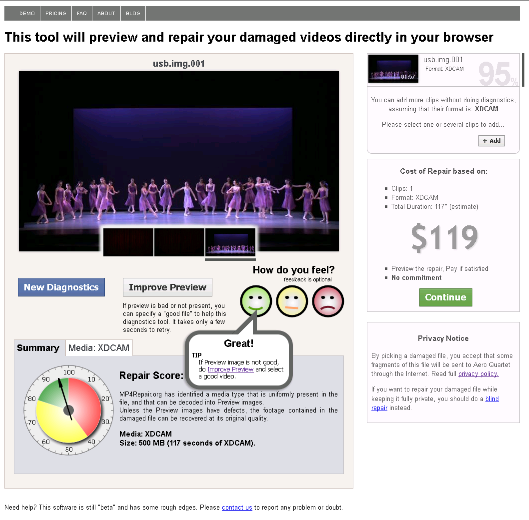
MP4repair.org is a web tool to preview and repair video inside a corrupt file. Diagnostics are free. By trying every tile, you will map all the video present in damaged disk.
In the example below you can see the first tile diagnostics results. Looks promising.
As suggested before, check all created tiles to find the footage you need to repair. To do this, simply click on the blue New Diagnostics button that is shown below the preview.
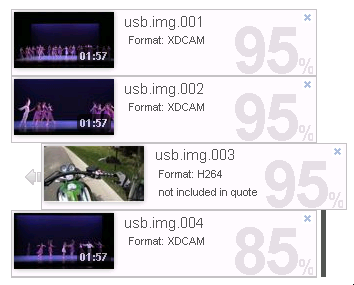
In case some tile shows No Media or simply a different footage you’re not looking for, just remove it from your cart by clicking the blue cross that is shown in the upper right corner of its list entry.

In this case, third tile file usb.img.003 is showing a different format and should be removed.
Once all the footage that needs to be recovered is found go on with the repair.
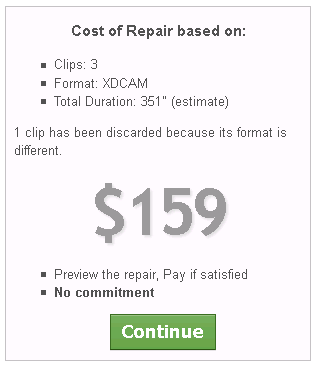
Don’t be afraid of the price shown during the tiles exploration. Final quote will be adjusted accordingly to the number of files to be repaired. Also keep in mind that Aero Quartet experts will keep an eye on the repair process.

Let’s see how to repair it in the third and last post of this series…
To be Continued…

